
SSH Tunneling
SSH tunneling routes your database connection through an encrypted tunnel to reach servers that aren’t directly accessible from your Mac. TablePro manages the tunnel lifecycle, including keep-alive and auto-reconnect.How SSH Tunneling Works
When to Use SSH Tunneling
- Database in private network
- Database accepts local connections only
- Need to encrypt database connection
- Access via bastion/jump host
Setting Up
Open the connection form, switch to the SSH Tunnel pane, toggle Enable SSH Tunnel on, fill in the SSH server details and auth, then go back to General and click Test Connection.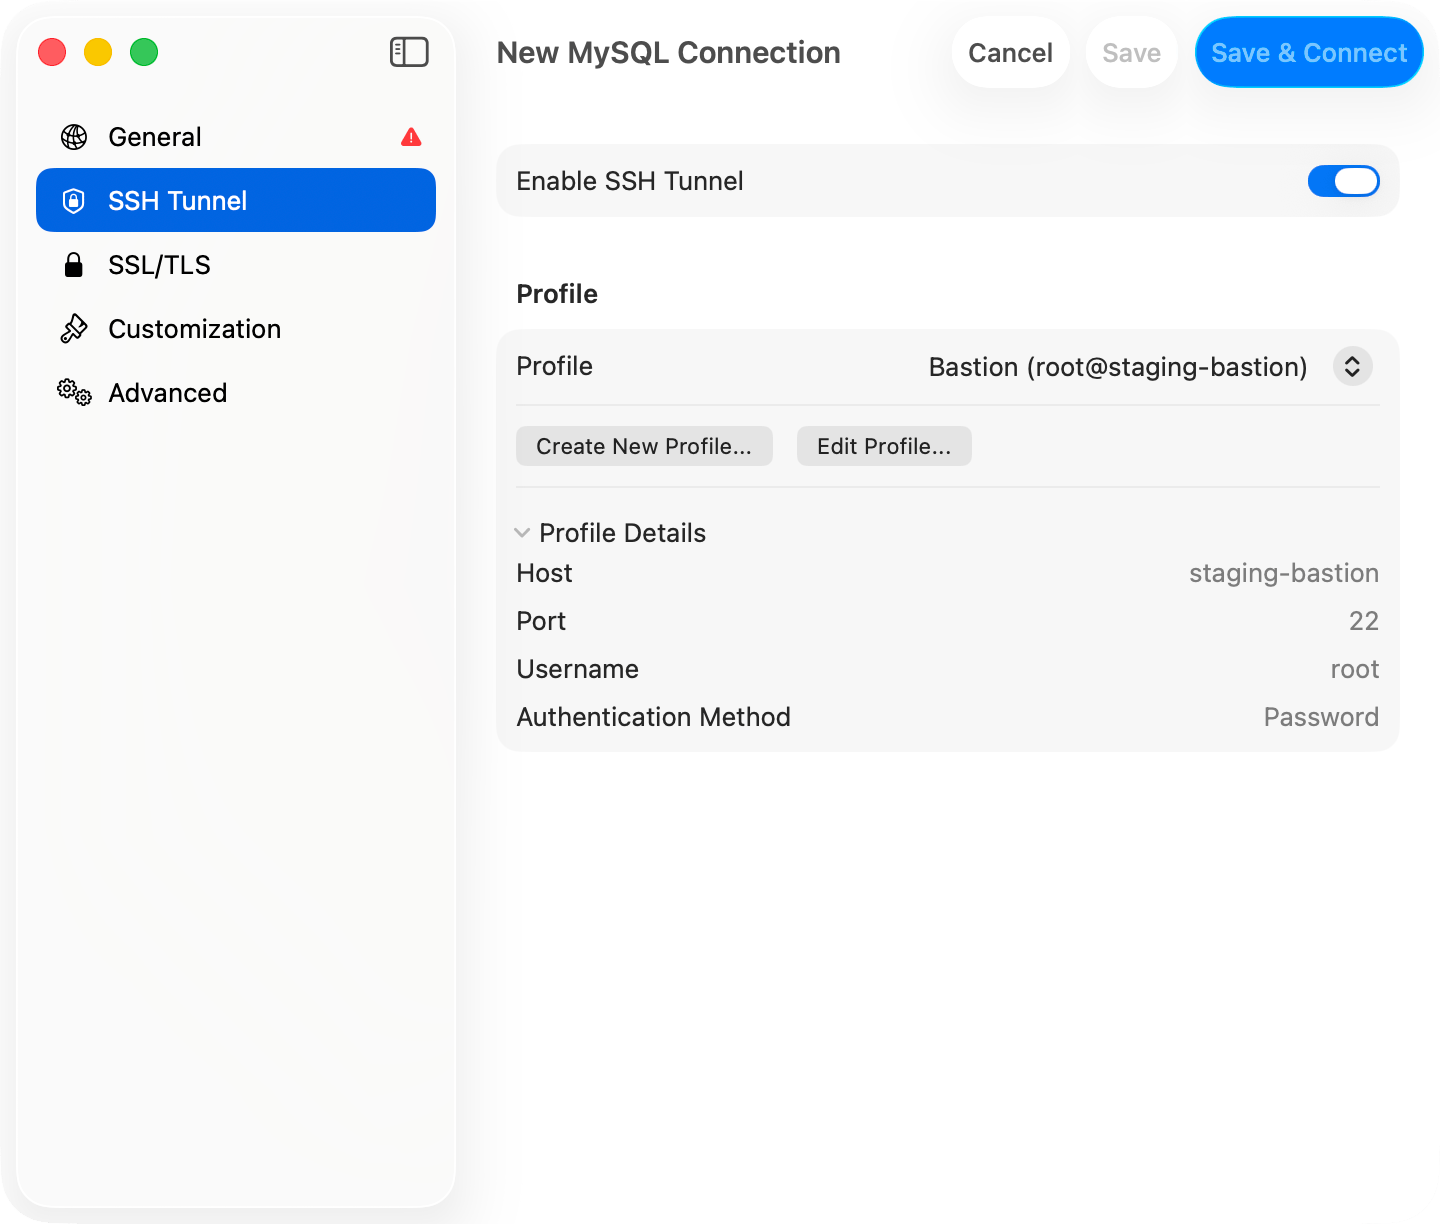
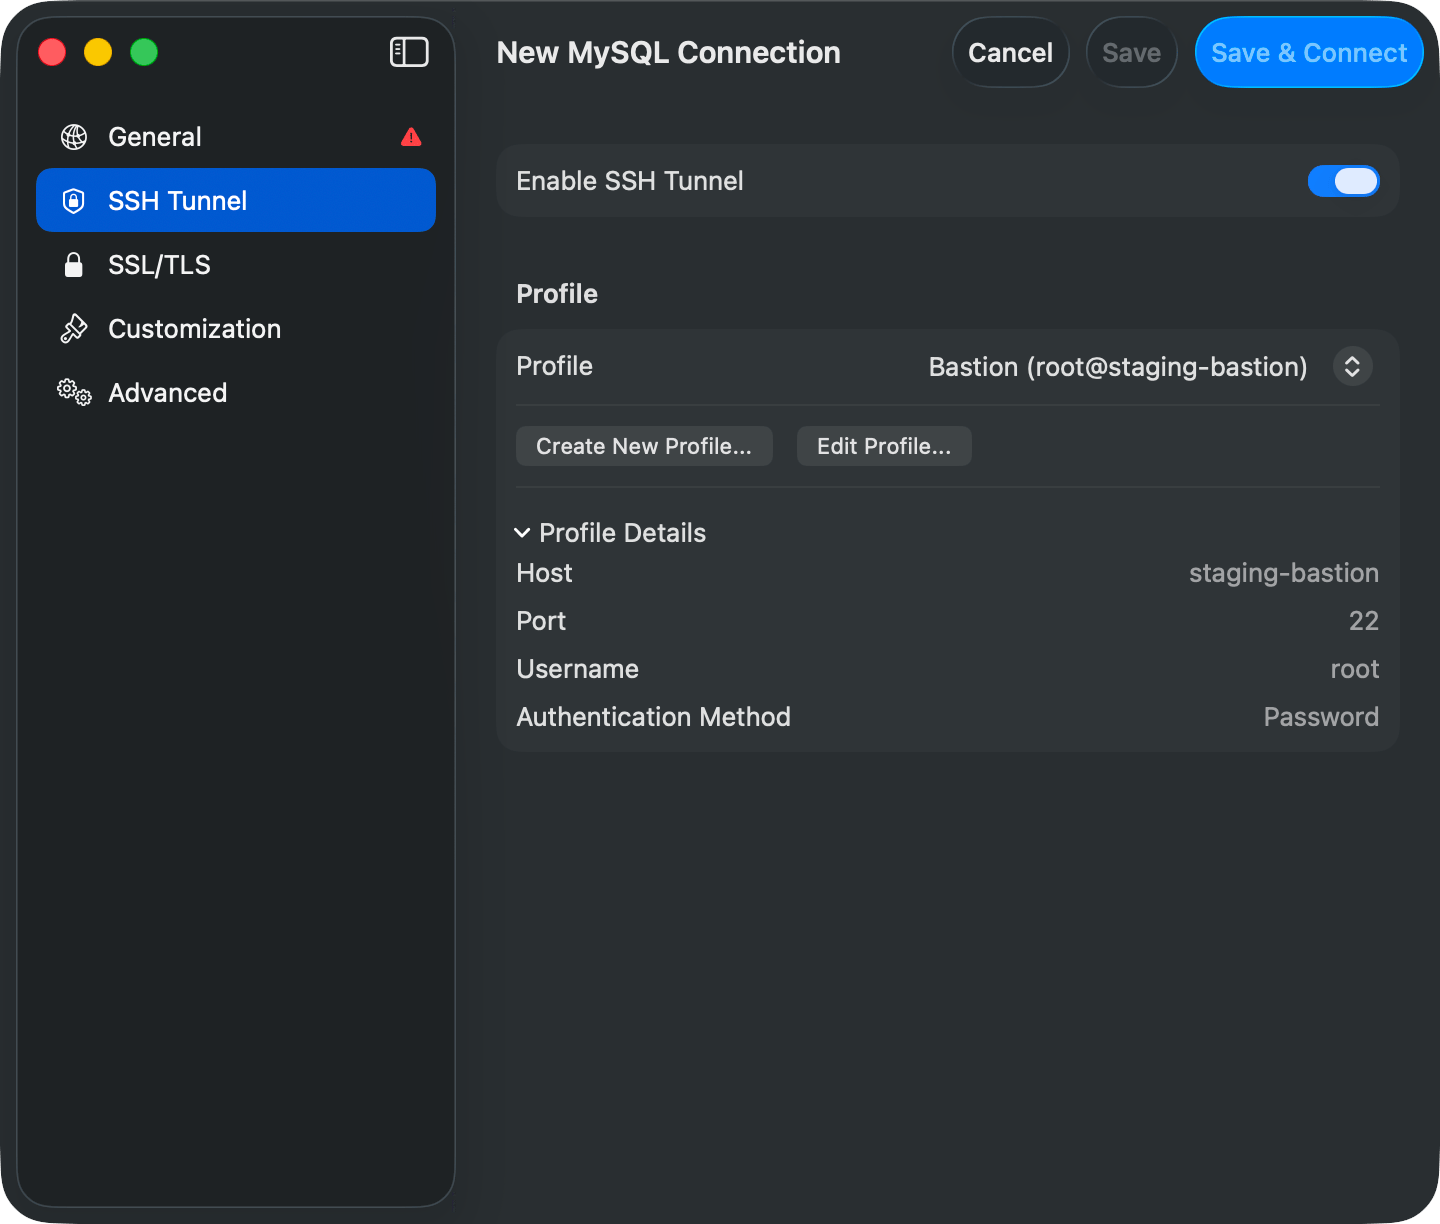
SSH tunnel configuration
SSH Configuration Options
SSH Server Settings
Authentication Methods
TablePro supports three SSH authentication methods:- Password
- Private Key
- SSH Agent
Simple password authentication:


SSH authentication: Password and Private Key options
Two-Factor Authentication (TOTP)
If your SSH server requires two-factor authentication via PAM (e.g.,google-authenticator, duo_unix), TablePro can handle TOTP (Time-based One-Time Password) codes during login.
The TOTP option appears under Two-Factor Authentication when you select Password or Keyboard Interactive as your auth method.
- Auto Generate
- Prompt at Connect
TablePro generates the TOTP code automatically at connect time using a secret you provide. No need to open an authenticator app.
- In the SSH tab of your connection settings, select Password or Keyboard Interactive as the auth method
- Under Two-Factor Authentication, choose your TOTP mode
- For Auto Generate: paste your base32-encoded TOTP secret
google-authenticator, duo_unix, and similar modules.
Host Key Verification
TablePro verifies SSH host keys to protect against man-in-the-middle attacks. On first connection to a server, you’ll see the server’s fingerprint and can choose to trust it. The key is then stored locally. If a previously trusted server’s host key changes, TablePro shows a warning. This could mean the server was reinstalled, or it could indicate a security issue. You can choose to accept the new key or abort the connection.Using SSH Config
If you have entries in~/.ssh/config, TablePro reads them automatically:
- TablePro reads your SSH config on launch
- Select a host from the SSH Host dropdown
- Settings are auto-filled from your config


SSH hosts imported from ~/.ssh/config
Database Connection Settings
When using SSH tunneling, the database host is relative to the SSH server:The database host should be what the SSH server uses to reach the database, not what your Mac would use.
Common Scenarios
Database on SSH Server
The database runs on the same machine as your SSH server:Database on Internal Network
The database is on a different server, only accessible from the SSH server:AWS RDS via Bastion
Connecting to RDS through an EC2 bastion host:Multi-Jump SSH (ProxyJump)
When a database server sits behind multiple bastion hosts, TablePro can chain SSH hops using OpenSSH’s-J (ProxyJump) flag. A single ssh process handles all intermediate jumps.
Setting Up Multi-Jump
- Open the connection form and switch to the SSH Tunnel pane
- Enable SSH and configure the final SSH server (the one that can reach the database)
- Expand the Jump Hosts section below the authentication settings
- Click Add Jump Host and fill in each intermediate bastion host in order
- Hosts are connected in sequence: first jump host is reached from your Mac, each subsequent host is reached through the previous one
Jump Host Settings
Each jump host has:Example: Two Bastion Hosts
SSH Config Integration
TablePro readsProxyJump directives from ~/.ssh/config. When you select a config host that has ProxyJump set, the jump hosts are auto-filled.
Jump hosts only support Private Key and SSH Agent authentication. Password authentication is not available for intermediate hops because OpenSSH’s
-J flag does not support interactive password prompts for jump hosts.SSH Key Setup
Generate keys:ssh-keygen -t ed25519. Copy to server: ssh-copy-id user@server. Keys must be chmod 600.
Import from URL
Skip the manual setup and paste a URL that encodes both SSH and database credentials. TablePro supports+ssh schemes for one-shot import.
For the full URL spec, see Connection URL Reference.
Format:
mysql+ssh, postgresql+ssh, postgres+ssh, mariadb+ssh
Example:
- SSH Host:
123.123.123.123, SSH Port:1234, SSH User:root - Database Host:
127.0.0.1, Database User:database_user, Database:database_name - Connection Name:
FlashPanel, Auth Method: Private Key
To import: click New Connection on the welcome screen, then Import from URL… in the chooser footer, and paste the URL. The form opens with everything pre-filled.
Troubleshooting
Connection Refused
Symptoms: “Connection refused” when testing SSH tunnel Causes and Solutions:-
SSH server not running
-
Wrong port
- Verify SSH port (some servers use non-standard ports)
- Check with server administrator
-
Firewall blocking connection
- Ensure port 22 (or custom port) is open
- Check both local and server firewalls
Authentication Failed
Symptoms: “SSH authentication failed” or “Permission denied” For Password Authentication:- Verify username and password
- Check if password auth is enabled on server
- Try connecting via terminal:
ssh user@server
- Verify key file path is correct
- Check key permissions (
chmod 600) - Ensure public key is in server’s
authorized_keys - Verify passphrase (if key is encrypted)
- Try connecting via terminal:
Private Key Errors
“Private key file not found”:- Verify the path exists
- Use the Browse button to select the file
- Re-enter the passphrase
- Test key manually:
ssh-keygen -y -f ~/.ssh/your_key
Tunnel Established but Database Fails
If the SSH tunnel connects but the database connection fails:-
Verify database host is correct (relative to SSH server)
-
Check database port
- Ensure port matches the database server’s actual port
-
Verify database credentials
- Username/password might be different from SSH credentials
Tunnel Drops Periodically
TablePro uses keep-alive settings to maintain tunnels:ServerAliveInterval=60: send keep-alive every 60 secondsServerAliveCountMax=3: disconnect after 3 missed responses
- Check network stability
- Verify server’s
ClientAliveIntervalsetting - Check for idle timeout settings on firewalls


Active SSH tunnel status indicator
Security Best Practices
Use key-based authentication with Ed25519 or RSA 4096+ bits, protect keys with a passphrase, and never expose database ports directly to the internet. SSH Agent (1Password, Secretive, orssh-agent) keeps private keys in a separate process. Use it instead of storing passphrases.